Dragon at Dawn Cross stitch

Dragon at Dawn Cross stitch Progress
Showing posts with label Manicure. Show all posts

Sunday, 11 January 2015

Welcome to 2015 :)


Hello Everyone! I'm Back after a VERY LONG absence :) I hope everyone had a good festive season and enjoyed with all your family and friends, and I wish everyone a good start to a new year, let's all hope this year brings good things to everyone!

I have been super busy with crafting during the last three months and that kept me away from here. This year I plan to make up for my absence and one of my resolutions is to keep this blog uptodate no matter what! My first target is to keep the weekly manicure on and I have changed it's date from Tuesday to the Weekend, so anytime between friday and sunday a manicure post shall come up every week :)  More sections will follow, but everyting depends on how good I manage my time. For the time being, I want to stick to the weekly manicure :)

On with the show and for this week I have prepared a very festive manicure. It matches the winter season well and for those who are already looking for carnival inspiration and plan to do something princessy, today's look is perfect. Without further ado, let the characters below welcome you to today's Frozen Manicure :)


So for this manicure you will need the following products:

  • Bornprettystore Holographic polish in blue
  • Bornprettystore Water transfers - snowflakes
  • Golden Rose Glitter polish in turqoise
  • Any top coat of your choice - I am using one by Debby Play

The first thing that needs to be done is to clean the nails. This will ensure that the polish lasts long and applies well.  You may apply a coat of clear polish or base coat to protect your nails, but I can assure you that these particular polishes do not stain the nails.

As soon as you are sure that your base coat is completely dry, apply three coats of the holo polish to all your nails except the ring fingers. Make sure that all your nails are completely dry before applying the next coat. This will help prevent any mishaps.  Apply three coats of Golden rose glitter to the ring fingers.  Here is how it should look:


 It already looks great and can be left like this if you wish :) Just clean the overspills :P  I took this photo in indoor lighting and that's the reason why the holographic is not showing off it's best.  If you look at it in the sunlight it will shine in all the colours of the rainbow. It also shows well in a spotlit place (such as a lift)

The tray at the back is a small chinese sauce holder which I got from Lidl and is filled with water in order to float the transfers.  Don't forget to remove the protective film before you float them.

Next up you will need a small shallow plate and some water in order to float your snowflakes.  After floating the transfers, pick them up gently, I use my own fingers but you can use a pair of tweezers.  Place the snow flakes on the holographic nails in any pattern that you wish, tap them lightly with a tissue to remove excess water, then either wait for them to dry or else use a hair drier to be quicker.  Once all the water has been removed and the transfers aren't moving around on your nails, apply a coat of top coat or clear polish.

This is the final look:
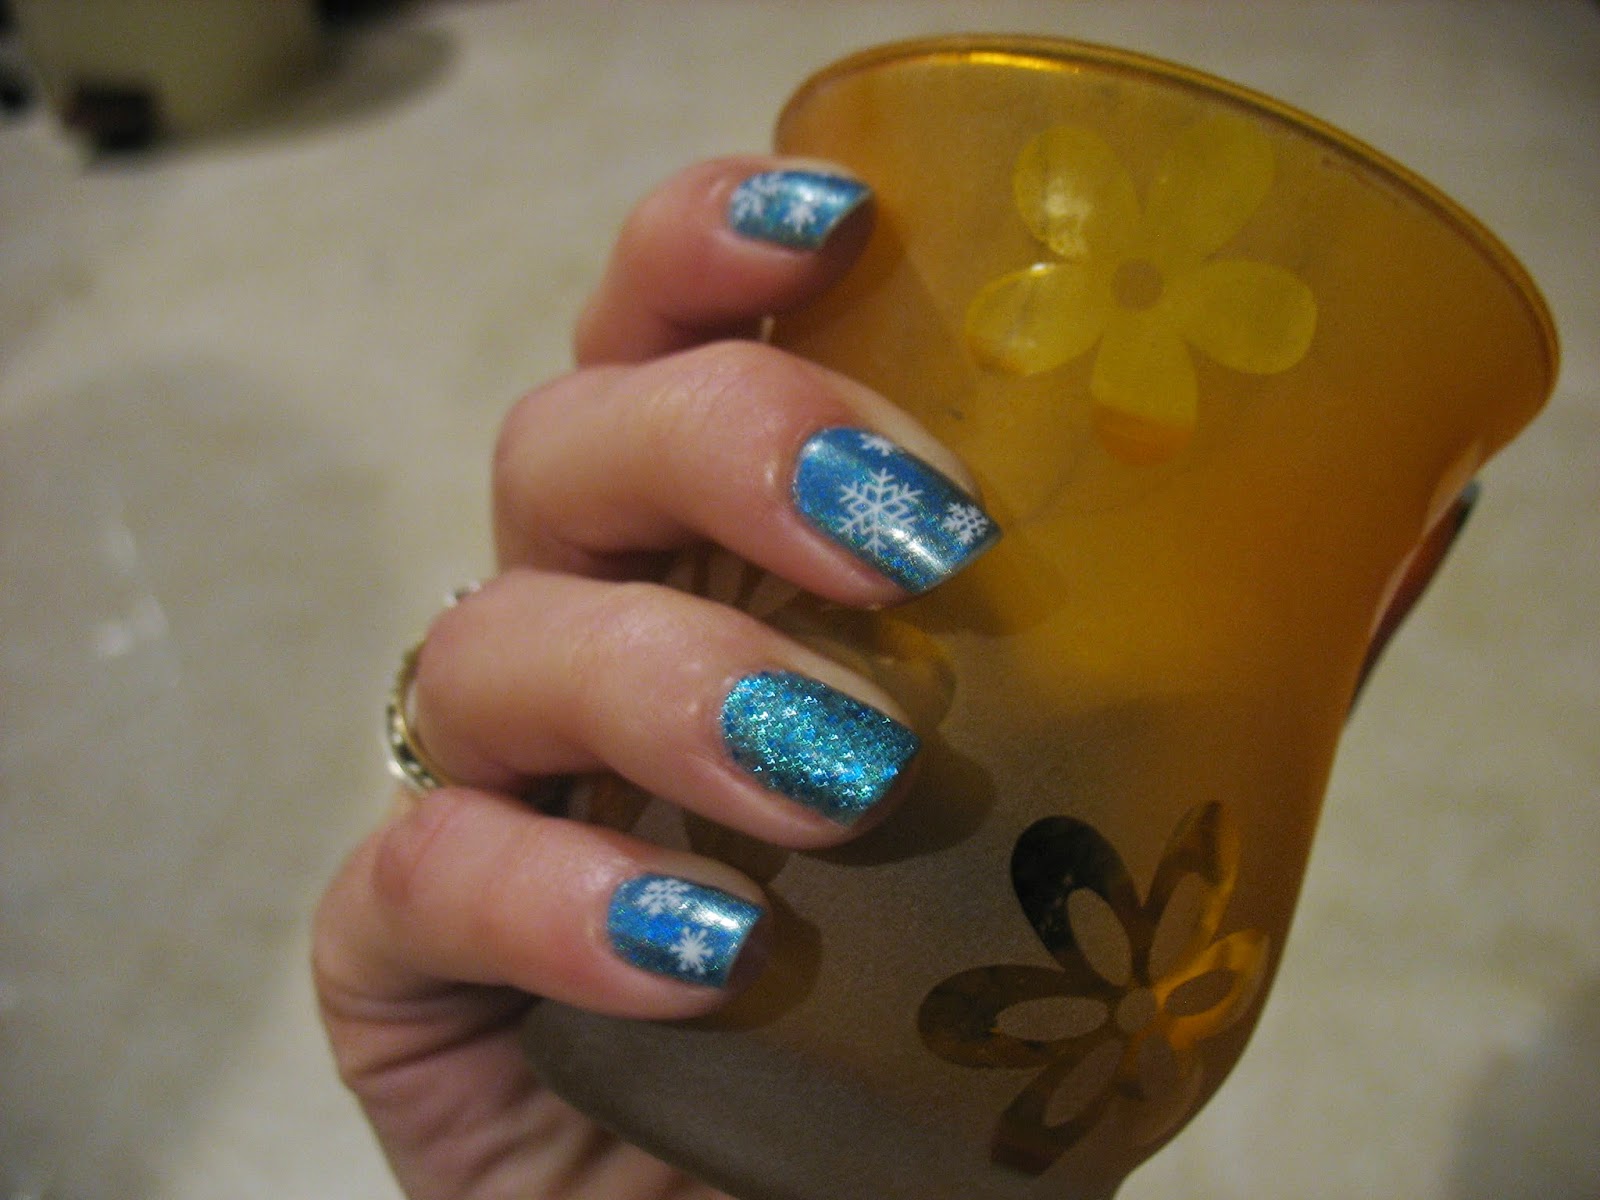

We have been missing sunlight this week so I couldn't shoot a good photo to show off the holos in all its power but you can see a little flicker in the photo above.

I hope you like this week's Frozen inspired manicure :) Let me know what you think in the comments :)

If you wish to get hold of the holographic polish and the transfer decals you can visit Born Pretty Store by clicking here. They have an extensive variety of products to choose from and they are very affordable :)


That's all for today and I will talk to you again next week for another Weekend Manicure :)

Saranghae
Pauline


Monday, 28 July 2014

Weekly Manicure!

Everyone! As promised I am back again this week with the weekly manicure. This time I was inspired by Gaya from Inspiring Generation and I wanted to try out her nail polish look but with a little bit more sophistication.  I dug up into my nail polish collections and found a blood red polish. The brand has long vanished from the bottle but I remember I got it from a very cheap store. Infact it performs cheaply too! Anyways, I paired the gold stickers from last week and this time chose the butterfly design.  Keep reading to learn how to create the look and see the finished result :)


http://asianwiki.com/images/8/85/Inspiring_Generation-0006.jpg


So here is how to create the look.  Gaya has blood red nails so it is important to get that colour right.

I applied two coats of my cheap red polish to get good coverage.  This time I cleaned any spill overs before applying the stickers.

Next, choose a nice gold design, I went for the butterfly from the gold lace design sheet from Born Pretty Store (there is a link to the shop on the right hand side)

 The butterflies are the second from right.

I cut the butterflies keeping the spots below the butterfly and my nails managed to fit two butterflies at a time.  Make sure that they all look in the same direction on the same hand. If your left hand nails have the butterflies looking to the right, then your right hand nails should have the butterflies looking to the left, such that they don't look akward when finished. Looks more professional as well.

Finally don't forget to apply one coat of top coat very gently as explained last week as otherwise you will loose the gold in minutes.  I didn't have time to do it because I was hosting a bbq here at home and my hands were drowned in water after everybody left, then it was too late to fix the missing gold. I didn't bother too much because I knew the polish was cheap and bound to chip in less than three days. In fact I managed to keep the looked pulled somewhat together only for the weekend. But it was fun sporting blood red nails and gold butterflies at the bbq. People thought I went to a nail technician and that I spent the weekend doing nothing just like a rich girl :)

Here are some pictures I shot the day after the bbq. You can see the gold leaving the butterfly below.


Not all the butterflies are nice and gold but the overall look is gorgeous and the outlines of the stickers are visible because there is no top coat.


Different lighting show that I didn't completely loose all the gold.

Well I guess that is it for today, don't forget to let me know your thoughts and show me your take on Gaya's nails :) I would love to see how you can make her nails look more 2014 :)  Don't forget that you can purchase your own gold lace sticker sheet from the link below.


10 styles Gold Lace 3D Nail Art Tips Stickers Manicure 223-232

Till next post,
Saranghae,
Pauline

Thursday, 24 July 2014

Weekly Manicure!


everyone! Sorry for being absent for so long, I keep from one day to another and the posts never write themselves up on their own!  Weekly manicure is back and this week I want to share with you a new product that I got from BornPrettyStore - Gold stickers!


This week's manicure uses the following products:
  • BK nail Polish in number 28 which is a very light pastel blue
  • Clear top coat by Debby ForPlay 1
  • Gold Filigree stickers from Born Pretty Store.

I also have a nailfile there to buff my nails because I had residue of gel nails before I did this manicure!

 I used the flowers to the right. There are two rows which were more than enough for this look!


First and foremost you must clean your nails becuase I find that pastel polishes are very susceptible to showing any small particles on the nails and form mini bubbles. I use a simple wipe down with polish remover and then give them a rinse with cold water.  Applying this particular BK polish is not very easy because the first coat looks aweful as you can see below, but just after two coats the nails look beautiful. I gave them 3 coats to make sure that I have a good coverage.  This particular polish smells of coconunts when it dries off and I can tell by the smell that the polish has dried. I always give it an extra 15 minutes in between coats so as to avoid any dents during application of other ornaments :)  The polish dries in minutes so a few extra won't harm.

That is one coat of polish


After you are satisfied with your colour, it is time to apply these gorgeous stickers. They come in a number of different designs on a transparent sheet, I chose the flowers and the wavy spots.  They are a little delicate and you have to have a pair of tweezers and mini sharp scissors handy.  Pull them gently out and cut the design you want. be carefull as the glue is very sticky and once you place them on your nails it is next to impossible to shift the position.  I decided to put the flowers all over the nails, keeping the half flowers for the corners of the nails and using the full ones depending on the size (as there are two sizes in the same strand) according to the nail size.  I finished off the design by applying the mini dots at the top of the nails.

This is the final look without the top coat.

The last step is very delicate with these stickers because if you are not carefull enough, the gold colour will fade away.  Fill up your topcoat brush with enough polish to cover the entire nail and try to apply it in one single gentle stroke without putting any pressure on the stickers. This will help not shifting the gold colour.  I tried skipping this step after the first nail had a little accident with the colour but I soon found out that even though the stickers are strong enough and stay on for a long time, the gold is dissolved by water and body washes. So try not to skip this step!

The end result is like a damask full of roses on a pale blue background.  It looks very complicated but is rather easy to do and I did get quite a lot of compliments :) People thought that I went to a nail technician and found it a little hard to believe that it was entirely my work!


I kept my nails on for as long as I could and here is the end result after 1 entire week where I did not bother too much to keep my hands away from house chores. Most of the flowers are still really gold!
Pretty impressive right!?! The durability of both stickers and polish is just amazing!  I love BK polishes so much because I can enjoy them for longer without worry to much about them!


If you would like to purchase the BK Polish and the Gold stickers click on the links below :)


18 Colors BK Sweet Candy Fast Dry Nail Art Polish/ 25-42#


10 styles Gold Lace 3D Nail Art Tips Stickers Manicure 223-232

Let me know your take at this design, or any other creative idea you create because I love seing your work! Post your pictures and comments down below and please stay tuned for more manicures in the coming days :) I plan to stick to weekly manicures for a long time :))

Thanks for reading!
Saranghae,
Pauline

Wednesday, 18 June 2014

Weekly Manicure


Hi Everyone!  Weekly Manicure is back and today I want to talk about one of my recent purchases from a local drug store - Golden Rose Jolly Jewels in 119 or as I describe it 'Carnival Glitters'.  I have already posted the whole haul here.

Front side

Back view


I had really high hopes for this polish and was so excited to try it out but it didn't quite turn out the way I wanted it so I won't be giving it a lot of praise!

This polish is very loaded with differently coloured glitters, mainly blue, green gold, pink and purple and they also vary in size. It has a transparent base so it can be layered on other colour polishes which is good. It also shines a real lot when hit by the sun or bright spotlights and I love this property very much! I like sparkly things :) 

You can see it is loaded with different sized glitters in many colours


The downside of it is that you need at least 3 very loaded coats to get good coverage and even then, you won't get glitters stuck next to each other, gaps will still show up. To add insult to injury, it really chips fast!! I wore it for a week but every other day I had to retouch the chipping parts. At least, it doesn't give a hint that it has been retouched. It suffers a lot from pen holding (I write a lot at work) and house chores are not at all helpful, especially doing the dishes! But still I had other polishes that stuck for longer. I don't expect a nail polish to last more than 3 days to be honest, especially if you use your hands a lot like I do, but chipping almost instantly isn't exactly good! At least it should last for a weekend, and my weekend starts on saturday afternoon and lasts on Sunday night, so I don't think that I am expecting much am I!?! Glitter polishes usually stick longer to the nail and are a real headache to remove, I can't say that about this one! It is rather easy to remove as well - maybe this is a pro?

Here are some shots of the polish on my nails:

Pretty glittery and sparkly

Here is how it looks with three loaded coats... too many glitters clammed at the top of the nail!


glitters tent to accumulate at the end of the nails.. you really need to be careful when applying this polish for an even finish

Can you see the chip on the side of the index finger? That was after 2 nights!


I will be trying out the other three polishes that I bought from this range and I hope I get better results, I will keep this one to overlay on other colours for that added spark. I don't reccommend this product if you are purchasing it to use it alone though.

Well I think this is all for today, I am sorry it turned out to be a negative review because I really had high hopes for this one. Better luck with the next glitter colour, hopefully!

Thanks for reading and till next post,
Saranghae 
Pauline

Monday, 14 October 2013

SOS Short Nails Manicure 2


Hello Everyone :) This week I am posting another SOS short nails manicure. My nails are still short (no miracles in a week) but they look slightly better so I decided to do some nail art.  I am still sticking to light colours and not so bulky nail designs because I don't want the nails to look overcrowded or awkward. The products that I will be using are my all time favorite Lioele Nail Hardener, L'Oreal Holographic Shine in 802 (this is rather old) and Born Pretty Store water decals.


The procedure is rather simple, just start off by following the basic steps shown below:

1. Apply base coat (Lioele Nail Hardener)                              
2. Apply 2 coats of the Holographic polish                              
3. Apply the water decals.                                                         
4. Seal everything off with a Top Coat (Lioele Nail hardener)   

The first two steps are very easy to do. Just make sure that you paint your nails evenly and allow each coat to dry thoroughly.

Step 3 requires more patience and attention.  You will need a small bowl of water, a pair of scissors and a pair of tweezers. I didn't use the tweezers because I wanted to finish off (was doing mine at 11pm) and it proved to be quite a pain since my own nails are short and didn't come in handy.

The water decals that I used are the smallest feathers featured in a sheet of 11 designs purchased from Born Pretty Store.  Here is a picture.  There are 2 complete sets of each design so technically there are 22 manicures. If you use each motif individually to highlight just a single nail, the sheet will last even longer.


A detailed tutorial on how to apply water decals can be found in my post here. Basically you have to cut out the designs you want, remove the protective film, soak the design in water until it can be taken off its backing and place the design gently on your nail using the tweezers. Soak up the excess water using a tissue and apply top coat to seal things off. Make sure the nail is completely dry or else you will get an irregular top coat finish.

Here is the finished look and some close ups of the nails.


My nails are really short by my standards :(


You can purchase your sheet of water decals from Born Pretty Store or else use the link that is featured in My Favorite Nail Products page in the tabs above.

I hope you enjoy this tutorial and find it useful.

Till next post,
Saranghae,
Pauline

Monday, 7 October 2013

SOS Short Nails!


Hello everyone!! Manicure Monday is back with a twist. I have spoken about some nail breakages I got a few weeks ago and now my nails are in a much better shape as I waited for them to grow out and even them out.  My nails are still short by my standards so I just can't do manicures as usual.  In any case today I want to share with you an idea for short nails.


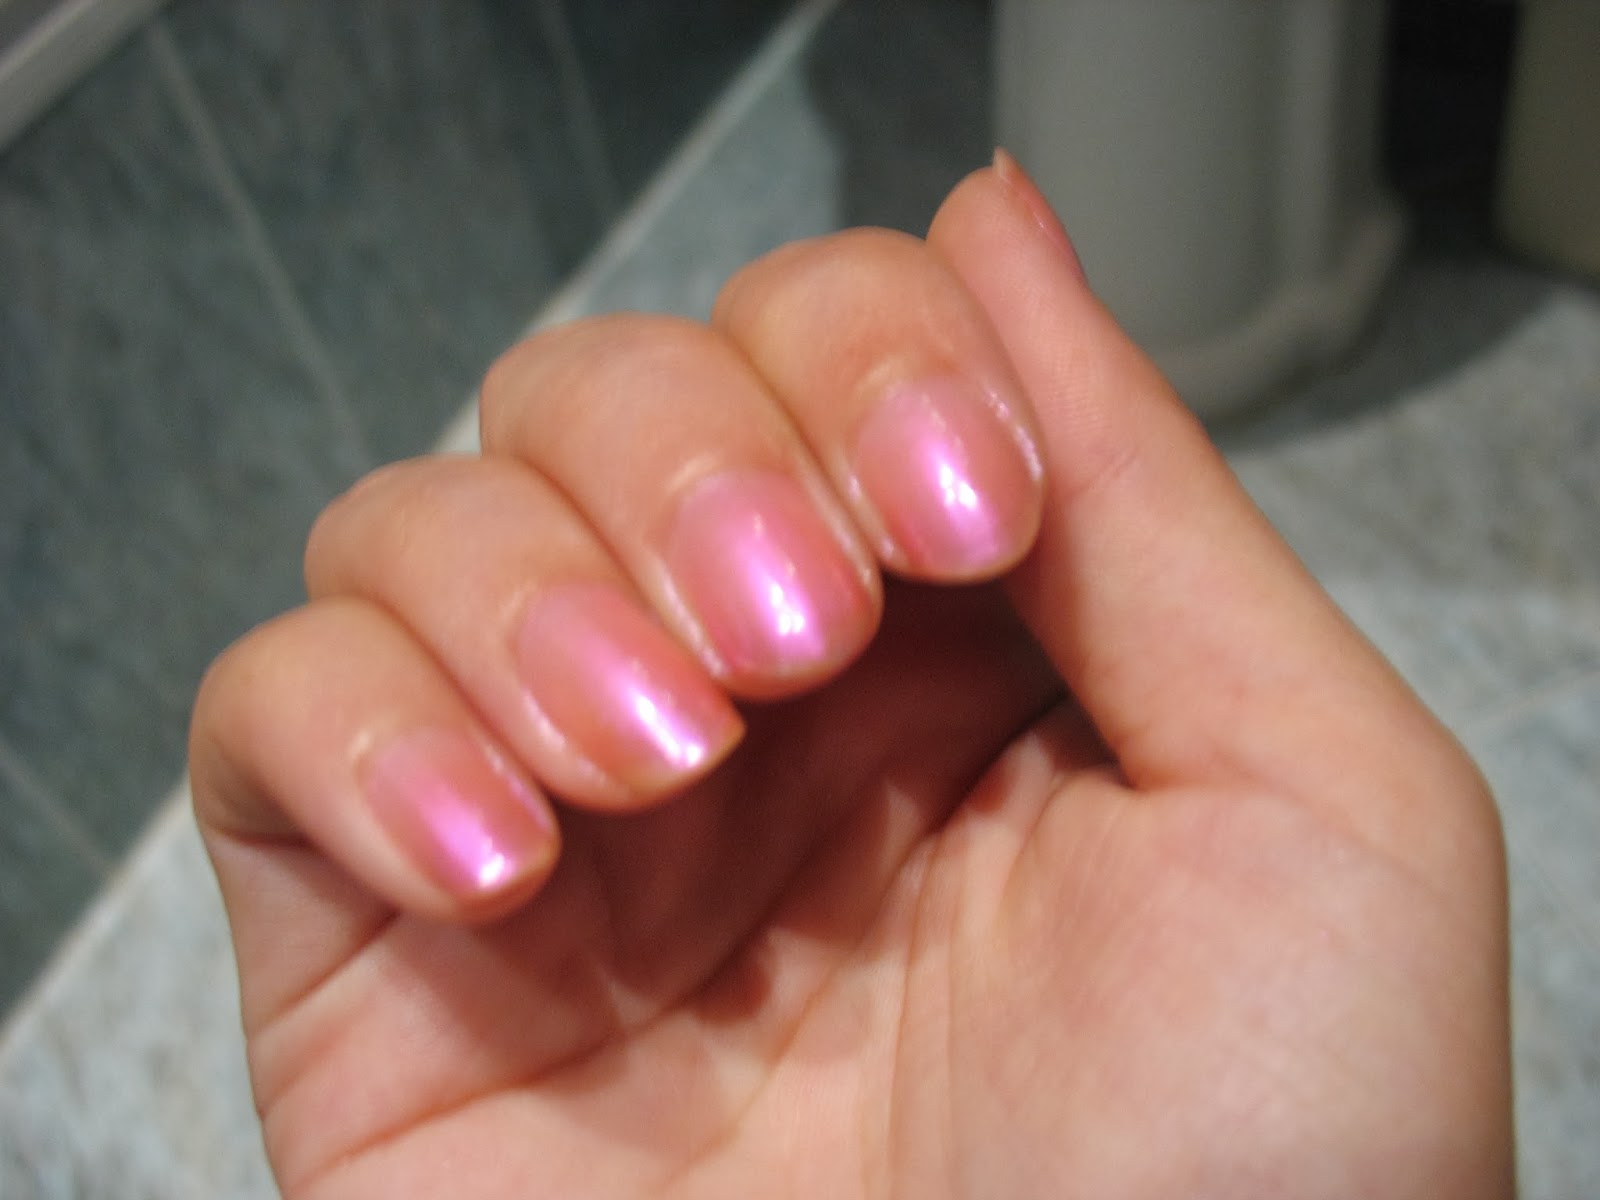
Short Nails call for Light colour polishes especially if your nail bed is short.  I don't have a short nail bed but I am so used to long nails that the moment I cut them down to my fingers I feel bad.  In order to give them a little something to boost them up, I decided to go through my stash in search for a light colour.  The Etude House polishes are light colours but are very opaque and show up a lot so they didn't qualify.  I found an old bottle of shimmery pink polish that is very translucent and decided to give it a go.  Here is the result:


Can you tell that I broke the middle finger? It started breaking from the side just above the skin and I had to let it grow a bit before I could cut it, because the breaking line went straight into the skin and it would hurt like hell! And I had the same happening to the other hand as well. Probably it is all due to the house work that I do every saturday :(

The colour is a very translucent pink that shimmers into purplish hues. It is not exactly a holographic polish though.  I tried to capture the shimmers but it's not that easy. The shimmers are more visible in sunshine rather than in my bathroom light :)  The above was done with just two coats of the polish, without base or top coat. It show as if there is nothing on my nails except when I move my hand around and it shines.  Quite a nice effect, it's a pity that I am running out of this particular shade.


Any short nail SOS... just leave a message and I will do my best to help. :) Remember to always go for a light colour so that people don't notice that your nails are this short, especially if you usually have long nails like myself. And another DON'T is leaving broken nails among long ones. They look terrible and give the impression that you are a Nail Biter (no offence intended here)

Anyways, I hope you found this useful in some way.. Short Nails = Short Post :)

Till next post,
Saranghae,
Pauline

Saturday, 31 August 2013

Weekly Manicure :) Ami and Sailor Mercury :)


So sorry for being so late in posting the Weekly Manicure but I had a little bit of experimenting to do :)

This manicure is going to serve a lot of tasks:

1.  It is a swatch and review of Etude House Ice Cream Nails in BL601 courtesy of W2Beauty
2.  It is a review and how to of striping tape courtesy of Born Pretty Store
3.  Phase one will be portraying Amy from Sailor Moon
4.  The complete manicure shall be portraying Sailor Mercury :)

Excited?   Let's get started :)


This is the base colour for the complete manicure. It is from Etude House's latest collection Ice Cream Nail in Blue BL601 which was sent to me from Alice of W2beauty as a gift with my previous hair care haul :)

This cute blue reminds me so much of Sailor Mercury's Bows that I decided it is the perfect shade to portray her both in her Senshi and Normal form.

I applied one coat of Nail hardener as a base, using my all time favourite Lioele Nail hardener which is running so low :(  The I painted my nails blue with one slightly thick coat of this cute blue. Here is a shot of the result :)

Hehe my nails aren't exactly clean and that's my desktop there :P

Well if you want you can stop here, apply a coat of top coat and clean the cuticles up, and you are ready :) 


I will be moving on to portraying Sailor Mercury!

To finish up the manicure I shall be using the following (the base colour is already finished):


Lioele Nail Hardener
Striping Tape in Metallic Blue and
Scissors (very shape)


Here is a close up of the striping tape.  This is easy to work with. All you have to do is peel the amount you need, place it on your nail and cut off the extras....but... you need a steady hand, a lot of patience and some immagination :)  I am going to show you how to do a simple design, firstly because it's my first time using tape and secondly, I don't want to scare everyone off with difficult stuff.

Basically what I am going to do is add two stripes to the side of each nail...they represent the stripes in Sailor Mercury's fuku or for those that are more of a motor head like me, they can be described as Racing stripes :)

Step 1:


I placed the tape to the far side of the nail and pressed it gently in a straight line. Avoid kinks as they will pull out faster.  Carefully I cut off the end.

Step 2:  Repeat the above placing the second stripe close to this one. Try to keep it straight as the gap in between the stripes will give you out if you slant it.

Step 3:  Apply a generous coat of top coat to keep everything in place.

Here is the result:

I have a dent in that nail there see... it got covered with striping tape :)


My opinion on the Striping Tape:

It is really useful to create crisp lines.  A steady hand is necessary to be able to move along without kinks. I applied the lines twice because the first time something went wrong and the taped turned silver. I am guessing it was because I washed my hands before applying the top coat.  The second time round the tape stayed a perfect metallic and the photo above is in fact showing the second set.  I had to be careful when pulling it off the roll as it can split from the centre.  It is also not useful for nail arts that are meant to last longer than 2 days as it starts pulling off at the tips.

Overall:

This tape deserved 4.5 Pink Diamonds:


I am reducing half a Diamond because it stays nice for a maximum of 3 days. I like to keep my manicures for a full week since I lack free time :)

You may purchase this tape from Born Pretty Store by following this link: Striping Tape  for only 99c of a dollar per roll :)


I hope you enjoyed this post and till next one,
Saranghae :)
Pauline