Dragon at Dawn Cross stitch

Dragon at Dawn Cross stitch Progress
Showing posts with label SOS Nails. Show all posts

Monday, 14 October 2013

SOS Short Nails Manicure 2


Hello Everyone :) This week I am posting another SOS short nails manicure. My nails are still short (no miracles in a week) but they look slightly better so I decided to do some nail art.  I am still sticking to light colours and not so bulky nail designs because I don't want the nails to look overcrowded or awkward. The products that I will be using are my all time favorite Lioele Nail Hardener, L'Oreal Holographic Shine in 802 (this is rather old) and Born Pretty Store water decals.



The procedure is rather simple, just start off by following the basic steps shown below:

1. Apply base coat (Lioele Nail Hardener)                              
2. Apply 2 coats of the Holographic polish                              
3. Apply the water decals.                                                         
4. Seal everything off with a Top Coat (Lioele Nail hardener)   

The first two steps are very easy to do. Just make sure that you paint your nails evenly and allow each coat to dry thoroughly.

Step 3 requires more patience and attention.  You will need a small bowl of water, a pair of scissors and a pair of tweezers. I didn't use the tweezers because I wanted to finish off (was doing mine at 11pm) and it proved to be quite a pain since my own nails are short and didn't come in handy.

The water decals that I used are the smallest feathers featured in a sheet of 11 designs purchased from Born Pretty Store.  Here is a picture.  There are 2 complete sets of each design so technically there are 22 manicures. If you use each motif individually to highlight just a single nail, the sheet will last even longer.


A detailed tutorial on how to apply water decals can be found in my post here. Basically you have to cut out the designs you want, remove the protective film, soak the design in water until it can be taken off its backing and place the design gently on your nail using the tweezers. Soak up the excess water using a tissue and apply top coat to seal things off. Make sure the nail is completely dry or else you will get an irregular top coat finish.

Here is the finished look and some close ups of the nails.


My nails are really short by my standards :(


You can purchase your sheet of water decals from Born Pretty Store or else use the link that is featured in My Favorite Nail Products page in the tabs above.

I hope you enjoy this tutorial and find it useful.

Till next post,
Saranghae,
Pauline

Monday, 7 October 2013

SOS Short Nails!


Hello everyone!! Manicure Monday is back with a twist. I have spoken about some nail breakages I got a few weeks ago and now my nails are in a much better shape as I waited for them to grow out and even them out.  My nails are still short by my standards so I just can't do manicures as usual.  In any case today I want to share with you an idea for short nails.


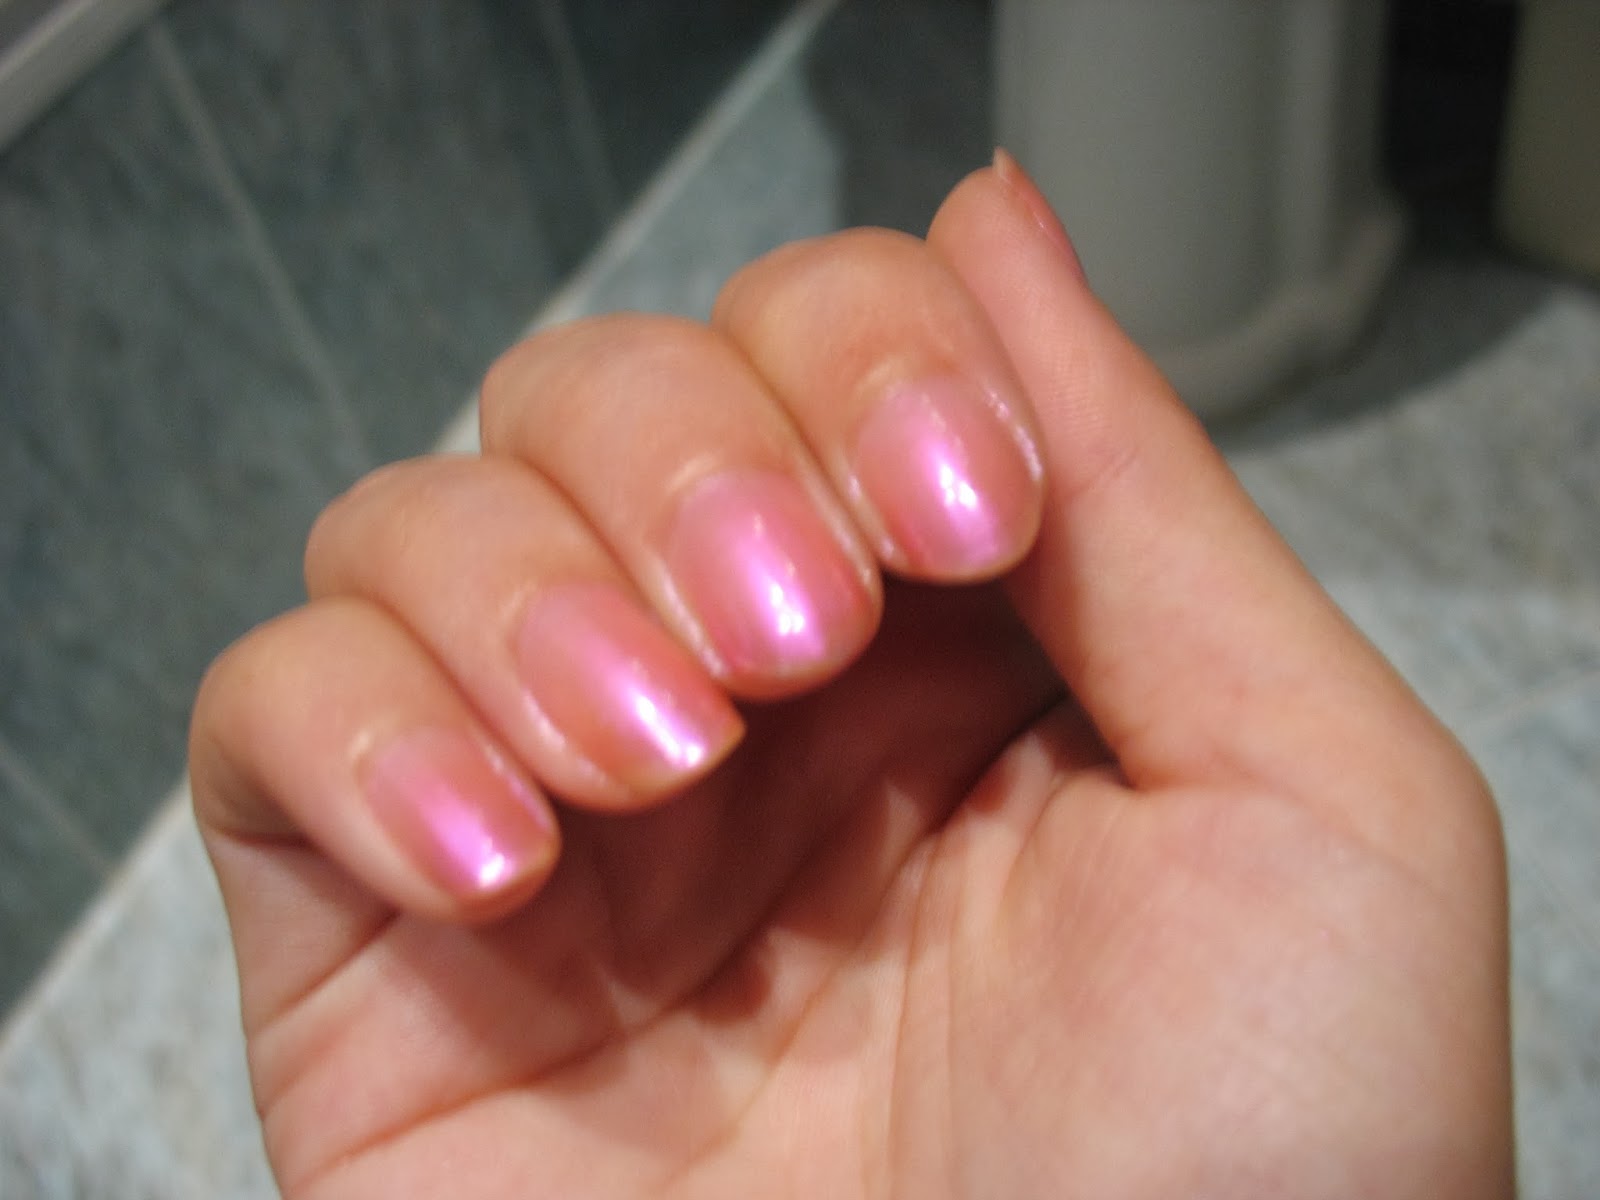
Short Nails call for Light colour polishes especially if your nail bed is short.  I don't have a short nail bed but I am so used to long nails that the moment I cut them down to my fingers I feel bad.  In order to give them a little something to boost them up, I decided to go through my stash in search for a light colour.  The Etude House polishes are light colours but are very opaque and show up a lot so they didn't qualify.  I found an old bottle of shimmery pink polish that is very translucent and decided to give it a go.  Here is the result:


Can you tell that I broke the middle finger? It started breaking from the side just above the skin and I had to let it grow a bit before I could cut it, because the breaking line went straight into the skin and it would hurt like hell! And I had the same happening to the other hand as well. Probably it is all due to the house work that I do every saturday :(

The colour is a very translucent pink that shimmers into purplish hues. It is not exactly a holographic polish though.  I tried to capture the shimmers but it's not that easy. The shimmers are more visible in sunshine rather than in my bathroom light :)  The above was done with just two coats of the polish, without base or top coat. It show as if there is nothing on my nails except when I move my hand around and it shines.  Quite a nice effect, it's a pity that I am running out of this particular shade.


Any short nail SOS... just leave a message and I will do my best to help. :) Remember to always go for a light colour so that people don't notice that your nails are this short, especially if you usually have long nails like myself. And another DON'T is leaving broken nails among long ones. They look terrible and give the impression that you are a Nail Biter (no offence intended here)

Anyways, I hope you found this useful in some way.. Short Nails = Short Post :)

Till next post,
Saranghae,
Pauline